Directories -> Presence
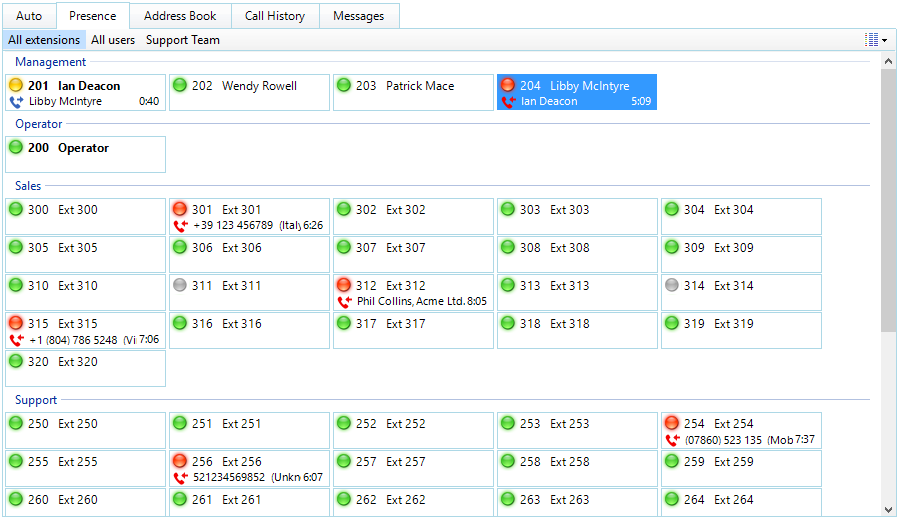
In its most basic form, the window provides a quick way to check the availability of your colleagues. The Extensions page allows the user to view all extensions stored on the Service Provider platform.

If you click on one of the entries in the Presence list, then a context menu should appear. Assuming that you are not already on a call, then the menu should contain the Make call item. By choosing this action, you can dial the extension directly.
If you had been on a call already, then the choices would have been Consult and Transfer in place of Make Call. This is appropriate because, if you are already on a call, then the expectation is that you are clicking on the extension with a view to transferring the call to them. You can also start a consult transfer to a colleague by double-clicking on their extension.
The icons' colors on the list have different meanings; solid red means that the extension is engaged on a call, and fluttering yellow means that there is a held call at the extension; solid grey means the extension is offline.
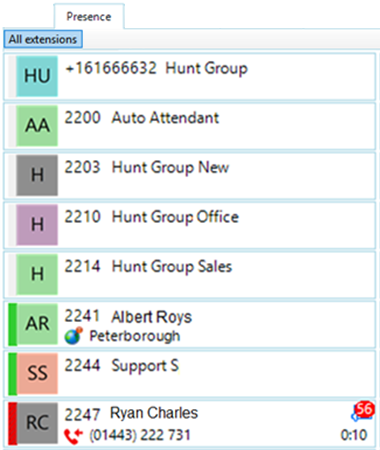
The voicemail message indicator notifies you of the number of waiting voicemail messages. Also can see the notifications of waiting voice messages left for other users represented as a voice message indicator on the top right of the extension. The extension (8513) is showing the number of messages left in a small red bubble.

Also you might have noticed the "All extensions" tab near the top of the panel; it denotes the page showing all of the extensions. You can add your own custom pages to the Extensions tab showing only the extensions you choose and you can do this in a couple of different ways.

To begin, you need to select the extension(s) to initially include on your new page; to select multiple extensions, hold down the "Control" key (CTRL) on your keyboard whilst clicking on each extension in turn or drag a marquee around them. Then, open the context menu by right-clicking on one of the selected extensions, go to the "Add to page" option and select the "New page" option.
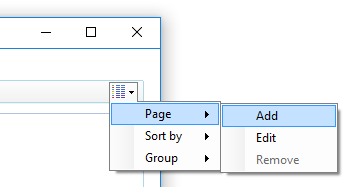
Alternatively, you can click the "List details" button in the top-right hand corner of the Extensions tab, go the "Page" option and then click the "Add" option.
Either way you will be presented with the "Edit page" window where you can enter the details for your new page.
Type the name of your custom page into the "Title" text box.
To specify a particular number of columns for displaying the extensions, enter the number into the "Columns" text box or leave it blank to let resize and arrange them automatically.
You can enter a DID number into the "DID number" text box to automatically switch to your new page when you answer a call from that DID number.
Click "OK" to save your new page's details and close the window or "Cancel" to discard them.

Your new page will show up immediately with your selected extension(s) in place. You can switch freely between the pages by clicking on the appropriate tab and adding an extension to a page does not remove it from its original position.
Once you've got a custom page of your own, you can add other extensions by right-clicking on one (or one of them if you have multiple extensions selected) and then going to the "Add to page" option again. This time your custom page will appear as an option above "New page" so you can click your page's option to add the extensions to it.
You can add as many custom pages as you like but there is a practical limit to the amount that will fit onscreen.
To remove an extension from a custom page, simply go to the page, right-click on the extension and then click the "Remove from page" option from the context menu.
To remove an entire page, make it the active page by clicking on its tab, click the "List details" button and then click the "Remove" option from the "Page" section. When you remove a custom page, it cannot be recovered so use this option with care. The extensions contained in a removed page are not removed from their original location.

 Report this page